Easy Stained Glass Cookies
Highlighted under: Whisked & Baked
These Easy Stained Glass Cookies are a delightful treat that combines a crunchy cookie with colorful candy centers. Perfect for holidays or any special occasion!
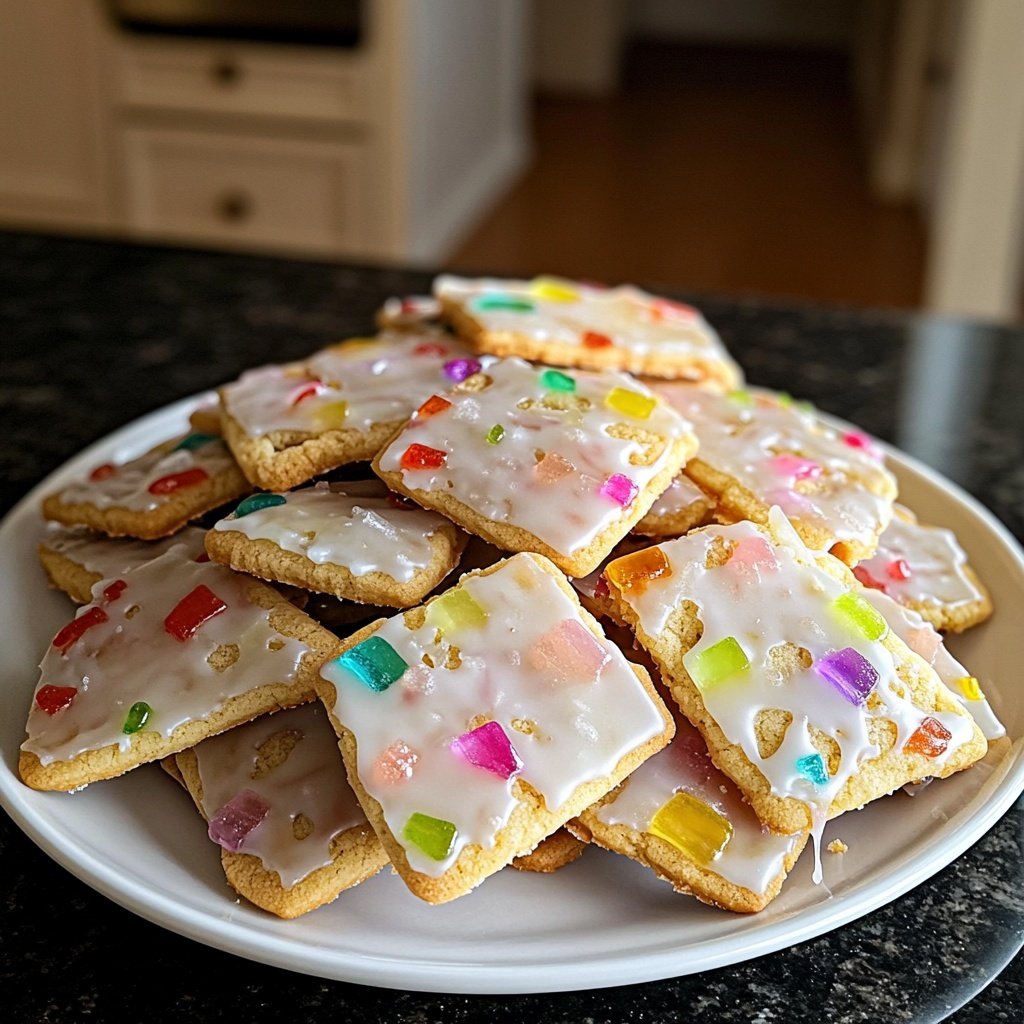
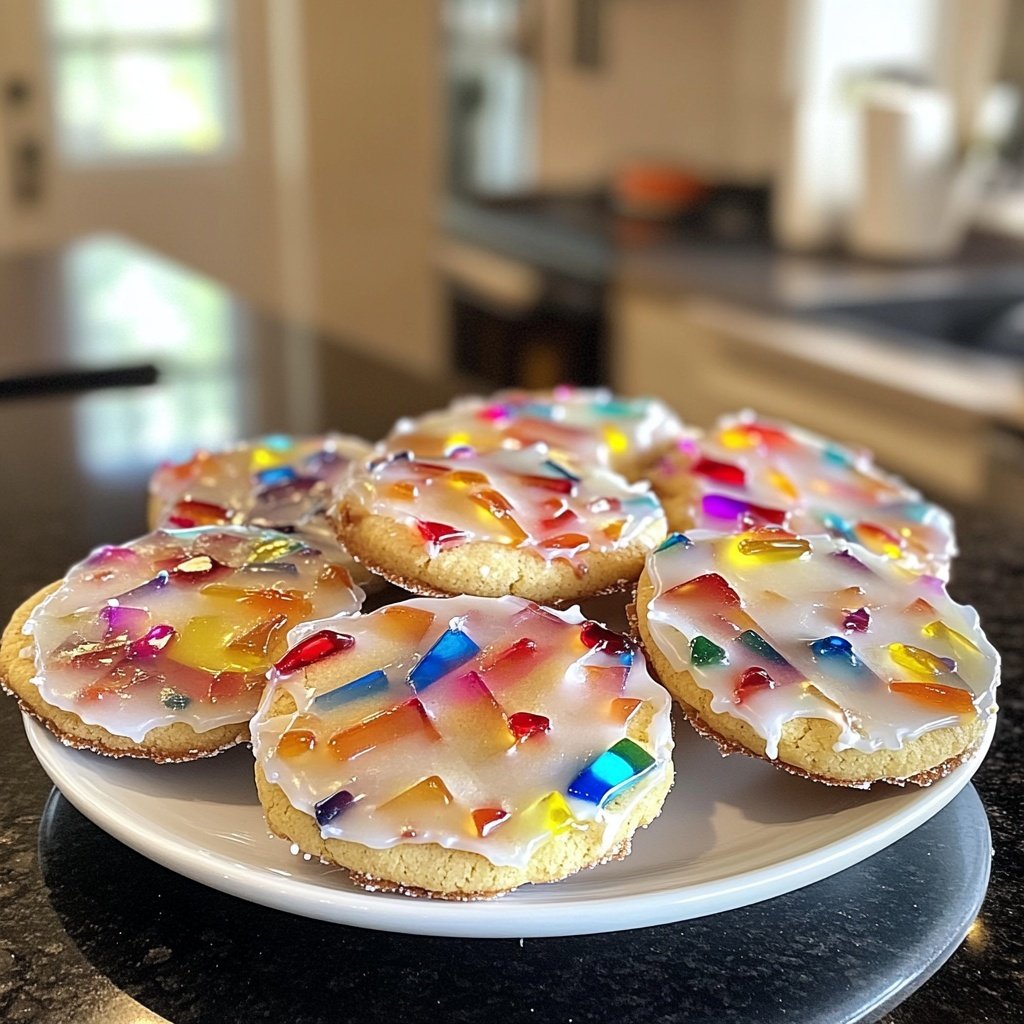
Stained Glass Cookies are a fun and festive treat that will brighten up any gathering. The colorful candy centers make them visually appealing, while the buttery cookie base provides a delicious flavor. Kids and adults alike will love helping to make these delightful cookies!
Why You Will Love These Cookies
- Bright and colorful appearance that pleases the eye
- Simple to make with easy-to-find ingredients
- Great for holiday parties and gift giving
- Fun activity to do with kids
The Perfect Holiday Treat
Stained glass cookies are more than just a sweet treat; they are a festive tradition that adds a splash of color and joy to any holiday celebration. With their vibrant candy centers, these cookies are a feast for the eyes as well as the palate. Whether you are baking for Christmas, Halloween, or a birthday party, these cookies are sure to impress your guests and bring smiles all around.
What makes these cookies particularly special is their versatility. You can easily customize the cookie shapes and colors to fit any occasion. From star shapes for the holidays to hearts for Valentine's Day, the possibilities are endless. Not only do they taste great, but they also serve as beautiful decorations that can enhance the festive atmosphere.
A Fun Activity for All Ages
Baking stained glass cookies is a delightful activity that you can enjoy with family and friends. Children will love helping to crush the candies and cut out the cookie shapes, making it an excellent way to bond and create lasting memories in the kitchen. This hands-on experience fosters creativity and a sense of accomplishment as they watch their edible art transform in the oven.
Moreover, engaging kids in the baking process teaches them valuable skills such as measuring ingredients, following instructions, and understanding the science behind baking. This recipe is simple enough for even novice bakers to follow, making it an ideal choice for family gatherings or educational activities.
Storing and Gifting Your Cookies
Once you've baked and cooled your stained glass cookies, it’s important to store them properly to maintain their freshness. Keep them in an airtight container at room temperature for up to a week. If you want to keep them even longer, consider freezing them. Just make sure to separate layers with parchment paper to prevent sticking.
These cookies also make fantastic gifts! Package them in a decorative tin or a clear cellophane bag tied with a ribbon for a charming presentation. Friends and family will appreciate the personal touch of homemade treats, making them the perfect gift for any occasion.
Ingredients
For the Cookies
- 1 cup unsalted butter, softened
- 1 cup granulated sugar
- 1 egg
- 1 teaspoon vanilla extract
- 3 cups all-purpose flour
- 1 teaspoon baking powder
- 1/2 teaspoon salt
For the Stained Glass Effect
- 1 cup crushed hard candies (such as Jolly Ranchers)
Make sure to crush the candies into small pieces for the best stained glass effect.
Instructions
Prepare the Dough
In a large bowl, cream together the softened butter and granulated sugar until light and fluffy. Beat in the egg and vanilla extract, mixing well.
In another bowl, whisk together the flour, baking powder, and salt. Gradually add the dry ingredients to the wet mixture, stirring until combined. Chill the dough in the refrigerator for 15 minutes.
Cut Out the Cookies
Preheat your oven to 350°F (175°C). Roll out the chilled dough on a floured surface to about 1/4 inch thick. Use cookie cutters to cut out shapes, and then cut out the center of each shape using a smaller cookie cutter.
Add the Candy
Place the cookie shapes on a baking sheet lined with parchment paper. Fill the center of each cookie with crushed hard candies.
Bake
Bake in the preheated oven for 8-10 minutes, or until the edges are lightly golden. Allow to cool on the baking sheet for a few minutes before transferring to a wire rack to cool completely.
Once the cookies are cool, the candy will be set, creating a beautiful stained glass effect.
Pro Tips
- Experiment with different shapes and colors of candy for a unique look!
Tips for Success
To achieve the best results with your stained glass cookies, ensure that your dough is chilled before rolling it out. This helps to prevent the cookies from spreading too much in the oven, preserving their beautiful shapes. Additionally, when cutting out the centers, be careful to leave enough cookie around the edges to support the candy filling during baking.
Using a variety of candy colors not only enhances the visual appeal but also allows for creative combinations. Try mixing different flavors of hard candies to create unique and delicious results. Just remember to crush the candies to a fine consistency to ensure they melt evenly.
Variations and Customizations
While the classic stained glass cookie is a crowd-pleaser, don’t hesitate to experiment with flavors and ingredients. Consider adding citrus zests like lemon or orange to the dough for a refreshing twist. You can also substitute some of the all-purpose flour with almond or coconut flour for a different texture and taste.
For a more indulgent treat, drizzle melted chocolate over the cooled cookies or sprinkle them with edible glitter. These little enhancements can elevate your cookies from delightful to extraordinary, making them even more special for your celebrations.
Questions About Recipes
→ Can I use different types of candy?
Yes, you can use any hard candy that melts well, such as Lifesavers or Werther's Originals.
→ How should I store these cookies?
Store in an airtight container at room temperature for up to one week.
→ Can I freeze these cookies?
Yes, you can freeze the baked cookies for up to 3 months. Just make sure they are completely cooled before freezing.
→ What if I don’t have cookie cutters?
You can use a glass or a knife to cut out shapes if you don't have cookie cutters.
Easy Stained Glass Cookies
Created by: Camilla Rhodes
Recipe Type: Whisked & Baked
Skill Level: Easy
Final Quantity: 24 cookies
What You'll Need
For the Cookies
- 1 cup unsalted butter, softened
- 1 cup granulated sugar
- 1 egg
- 1 teaspoon vanilla extract
- 3 cups all-purpose flour
- 1 teaspoon baking powder
- 1/2 teaspoon salt
For the Stained Glass Effect
- 1 cup crushed hard candies (such as Jolly Ranchers)
How-To Steps
In a large bowl, cream together the softened butter and granulated sugar until light and fluffy. Beat in the egg and vanilla extract, mixing well.
In another bowl, whisk together the flour, baking powder, and salt. Gradually add the dry ingredients to the wet mixture, stirring until combined. Chill the dough in the refrigerator for 15 minutes.
Preheat your oven to 350°F (175°C). Roll out the chilled dough on a floured surface to about 1/4 inch thick. Use cookie cutters to cut out shapes, and then cut out the center of each shape using a smaller cookie cutter.
Place the cookie shapes on a baking sheet lined with parchment paper. Fill the center of each cookie with crushed hard candies.
Bake in the preheated oven for 8-10 minutes, or until the edges are lightly golden. Allow to cool on the baking sheet for a few minutes before transferring to a wire rack to cool completely.
Extra Tips
- Experiment with different shapes and colors of candy for a unique look!
Nutritional Breakdown (Per Serving)
- Calories: 120 kcal
- Total Fat: 6g
- Saturated Fat: 4g
- Cholesterol: 30mg
- Sodium: 50mg
- Total Carbohydrates: 15g
- Dietary Fiber: 0g
- Sugars: 8g
- Protein: 1g